
A small piece of missing paint can be surprisingly noticeable. You may have a perfectly clean wall, door, cabinet, or piece of furniture, but one chipped spot can draw your attention every time you walk past it. The good news is that fixing chipped paint is usually a straightforward job. You do not necessarily need to repaint an entire room or hire someone for a tiny damaged area.
The real trick is not simply putting new paint where the old paint has disappeared. A neat repair depends on what you do before opening the paint can. The damaged edges need to be stable, the surface needs to be clean, and any depression needs to be leveled before the new coating goes on.
If you are wondering how to repair chipped paint at home, the process below will help you handle the job from beginning to end.
Start by Checking the Damage
Take a close look at the chipped section before doing anything else. Some chips are only on the surface, while others remove several layers of paint and expose drywall, plaster, wood, or metal underneath.
Run your fingertips gently around the damaged area. If the surrounding paint feels loose or lifts easily, more preparation is needed. Do not leave weak paint around the chip simply because it does not look damaged from a distance. It can eventually lift beneath your new paint.
Also check for moisture. If the paint has chipped because of a leak, condensation, or dampness, repairing the appearance without dealing with the moisture will probably lead to another problem later.
Gather a Few Basic Supplies
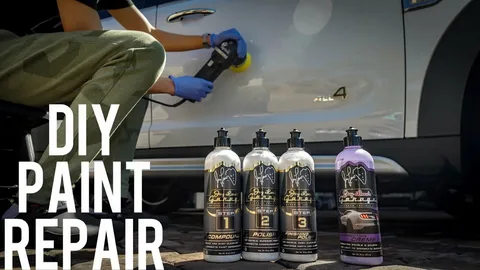
Most small repairs can be handled with ordinary household painting supplies. A flexible putty knife is useful for removing loose paint and applying filler. Fine sandpaper helps smooth the surface, while a clean cloth removes dust.
You will also need a suitable filler if the damaged area is lower than the surrounding surface. Primer may be necessary if bare drywall, wood, or another material has been exposed.
Finally, you need paint that is as close as possible to the existing finish. Having the correct color is important, but matching the sheen is just as important for making a touch-up less noticeable.
Remove the Paint That Is No Longer Secure
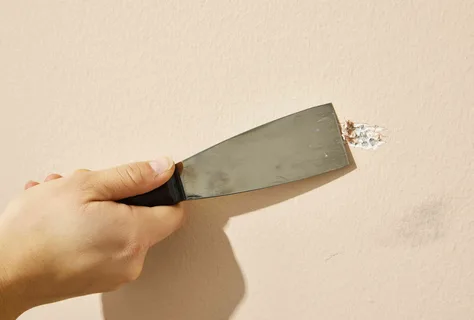
Place the edge of your putty knife underneath loose paint and gently lift it away. Work slowly rather than forcing the tool into the wall.
You are trying to create a stable repair area. If a piece of paint is already separating from the surface, leaving it in place can cause the new paint to fail around it.
Do not keep scraping beyond the damaged section without a reason. The goal is to remove unstable material, not to enlarge the repair unnecessarily.
Once you finish scraping, look at the boundary of the damaged area. It should no longer have loose or curled edges.
Smooth the Transition
A chipped spot can have a sharp edge where the old paint meets the exposed surface. That edge may remain visible after repainting unless it is softened.
Take fine sandpaper and gently smooth around the perimeter. You do not need to press hard. A few careful passes are usually enough to reduce the raised edge.
After sanding, touch the area with your fingertips. You are looking for a gradual transition rather than a noticeable step between the old paint and the repair.
Remove the sanding dust before applying anything else.
Fill Any Depression
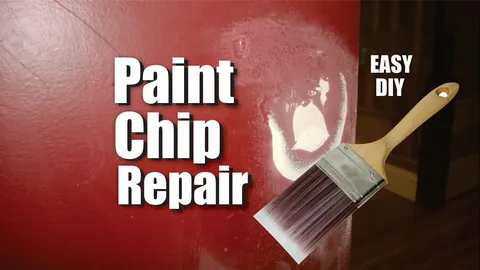
If the chip is shallow, you may not need much filler. But when the missing paint has left a noticeable hollow, filling it can make a big difference.
Spread a small amount of suitable filler over the damaged area using a putty knife. Keep the layer relatively thin and smooth.
Trying to fill a deep hole in one heavy application is not always the best approach. A thin layer that dries properly is easier to control and sand.
Let the filler dry according to the product instructions. Once it has hardened, lightly sand it until the surface feels level with the surrounding wall.
If you can still feel a dip, add another small amount of filler instead of applying excessive pressure while sanding.
Clean Before Priming
After sanding, remove all remaining dust. A clean, dry surface gives primer and paint a better chance of bonding properly.
A soft cloth can usually handle a small repair. Avoid leaving moisture on drywall or other absorbent materials.
This step may seem insignificant, but dust trapped underneath paint can leave a rough texture and make the repair more visible.
Decide Whether Primer Is Needed
Primer is particularly helpful when the chipped area has exposed a different material from the surrounding painted surface.
For example, exposed drywall can absorb paint differently from an already sealed wall. Bare wood can also behave differently from an existing painted surface.
Apply a suitable primer to the repaired area and let it dry completely. You do not necessarily need to prime the entire wall for a small touch-up, provided the product and existing surface allow localized priming.
Once the primer is dry, check the surface again. If it feels rough, a very light sanding can help before the final paint.
Matching the Existing Paint
This is where many otherwise good repairs go wrong.
A paint color that looks similar on a color card may not look identical on an existing wall. Paint can change slightly over time because of sunlight, cleaning, aging, and environmental conditions.
If you still have the original paint, that is usually the easiest option. If you do not, take a sample to a paint store for matching when possible.
Do not forget about the finish. Two paints can have almost identical colors but look different because one is matte and the other is glossy.
Apply the First Touch-Up Coat
Use a small brush or another suitable applicator depending on the surface.
Do not overload the brush. Too much paint can create a thick spot that catches light differently from the rest of the wall.
Apply a controlled coat over the repaired area. You can slightly extend the paint beyond the repair so there is no obvious hard border.
Give the paint enough time to dry before deciding whether another coat is necessary.
Build the Finish Slowly
If the first coat does not completely cover the primer or repaired section, do not try to solve the problem by applying a very thick second coat.
A thinner additional coat usually gives you more control. It also reduces the chance of creating a raised area.
Stand back after the paint has dried and look at the repair from different angles. Natural light can reveal differences that are difficult to see directly above the patch.
Making a Small Repair Less Noticeable
A perfectly invisible touch-up is not always possible, especially when the surrounding paint is old or faded. However, you can make the difference much harder to notice.
Keep the repaired surface flat. Avoid leaving brush marks or excessive paint around the edges.
For textured walls, the texture itself may also need to be reproduced before painting. A smooth patch on a textured wall can remain visible even when the color is correct.
For larger damaged sections, repainting the wall from one corner to another may produce a more consistent appearance than repeatedly touching up individual spots.
How to Repair Chipped Paint on Wood
Wood surfaces need careful preparation because the exposed material can absorb coatings differently.
Remove loose paint and sand the damaged edges. If the chip has created a small depression, use a wood-appropriate filler.
After the filler has dried, sand it smooth and remove the dust. Primer can then be applied before the matching paint.
This method works for many painted wooden surfaces, including doors, window trim, shelves, and furniture.
Fixing Chipped Paint on a Door
Doors experience frequent contact, so chips around corners, handles, edges, and frames are common.
Clean the area first, then remove loose paint. Smooth the damaged edges and fill any deeper indentation.
After the surface has been prepared, apply primer where appropriate and repaint the area.
If the door has multiple damaged spots, repairing each one separately may create visible variations. In that situation, repainting the complete door can sometimes provide a more uniform result.
What About Chipped Exterior Paint?
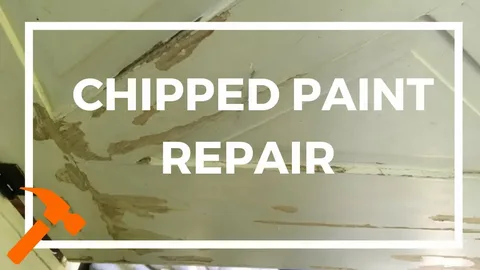
Outdoor paint has to deal with rain, sunlight, temperature changes, and humidity, so exterior chips deserve additional attention.
Before repairing an exterior surface, make sure the area is dry. Remove loose material and inspect the surrounding paint for additional peeling.
If the surface is exposed to moisture, identify the source before repainting. Otherwise, the new paint may fail again.
Use products designed for exterior conditions and follow the manufacturer’s instructions for preparation and drying.
When Chipped Paint Is a Sign of a Bigger Problem
Not every paint chip is simply a cosmetic issue.
If you repeatedly find peeling or chipped paint in the same location, investigate why it keeps happening. Water intrusion is one possibility, but poor adhesion, movement, excessive humidity, or incompatible coatings can also contribute.
Large areas of bubbling paint should not simply be covered with another coat. The underlying surface may need repair first.
The same principle applies to wood and metal. If exposed wood is deteriorating or exposed metal is rusting, the material needs attention before the paint can provide a lasting finish.
Mistakes That Can Ruin a Paint Repair
One common mistake is skipping the scraping stage. Painting over loose edges only hides the problem temporarily.
Another is failing to sand the filler. Even if the filler looks smooth while wet, it can leave a visible ridge once dry.
Using the wrong type of filler can also cause trouble. Products intended for interior walls may not be appropriate for exterior surfaces, wood, or metal.
Rushing between coats is another problem. Paint needs time to dry and settle. Touching or recoating it too soon can affect the final texture.
Finally, avoid judging the color while the paint is still wet. Fresh paint can look different before it fully dries.
Keeping Painted Surfaces in Better Condition
Once you have repaired the chip, a little care can help prevent future damage.
Move furniture carefully rather than dragging it against painted walls. Use appropriate cleaning methods for the paint finish and avoid harsh chemicals unless the coating is designed to handle them.
In humid rooms, ventilation can help reduce moisture-related paint problems. Check around windows, sinks, ceilings, and other areas where water may enter or collect.
Small scratches are easier to deal with than large peeling sections, so addressing minor damage early can save you from a much bigger repair later.
How Long Will the Repair Last?
The durability of a chipped paint repair depends on the condition of the surface, the reason the original paint failed, and the quality of preparation.
A properly prepared interior wall can remain in good condition for a long time. On the other hand, a repair made over damp or unstable material may fail quickly.
That is why preparation matters more than simply applying a new layer of paint. A neat-looking repair begins with a sound surface.
Final Thoughts
Learning how to repair chipped paint does not require complicated equipment or advanced painting skills. The process is mostly about taking your time and preparing the damaged area correctly.
Remove loose paint, smooth the edges, fill low spots, clean away dust, prime exposed surfaces when needed, and then apply a matching paint carefully. Give each material enough time to dry before moving to the next stage.
For a small chip, these simple steps can make a surprisingly big difference. Instead of allowing one damaged spot to make an otherwise clean surface look worn, you can restore it and keep the area looking fresh without repainting everything.












Leave a Reply